Installing Nucleus Rev A Internal Storage
These step-by-step instructions will walk you through the process of installing an HDD or SSD for internal music storage in Nucleus.
Step 1: Make sure you have everything
- 2.5" HDD or SSD with a drive height of 7mm or 9mm for Nucleus Rev A and up to 15mm for Nucleus Rev B. If you're unsure of what version of Nucleus you own, please take a look at our Do I have Nucleus Rev A or Nucleus Rev B? article.
- 4 black screws
- 4 silver screws*
- 2 hard drive rails*

Your hard drive rails and silver screws may already be installed inside Nucleus, if so, simply move on to step 2
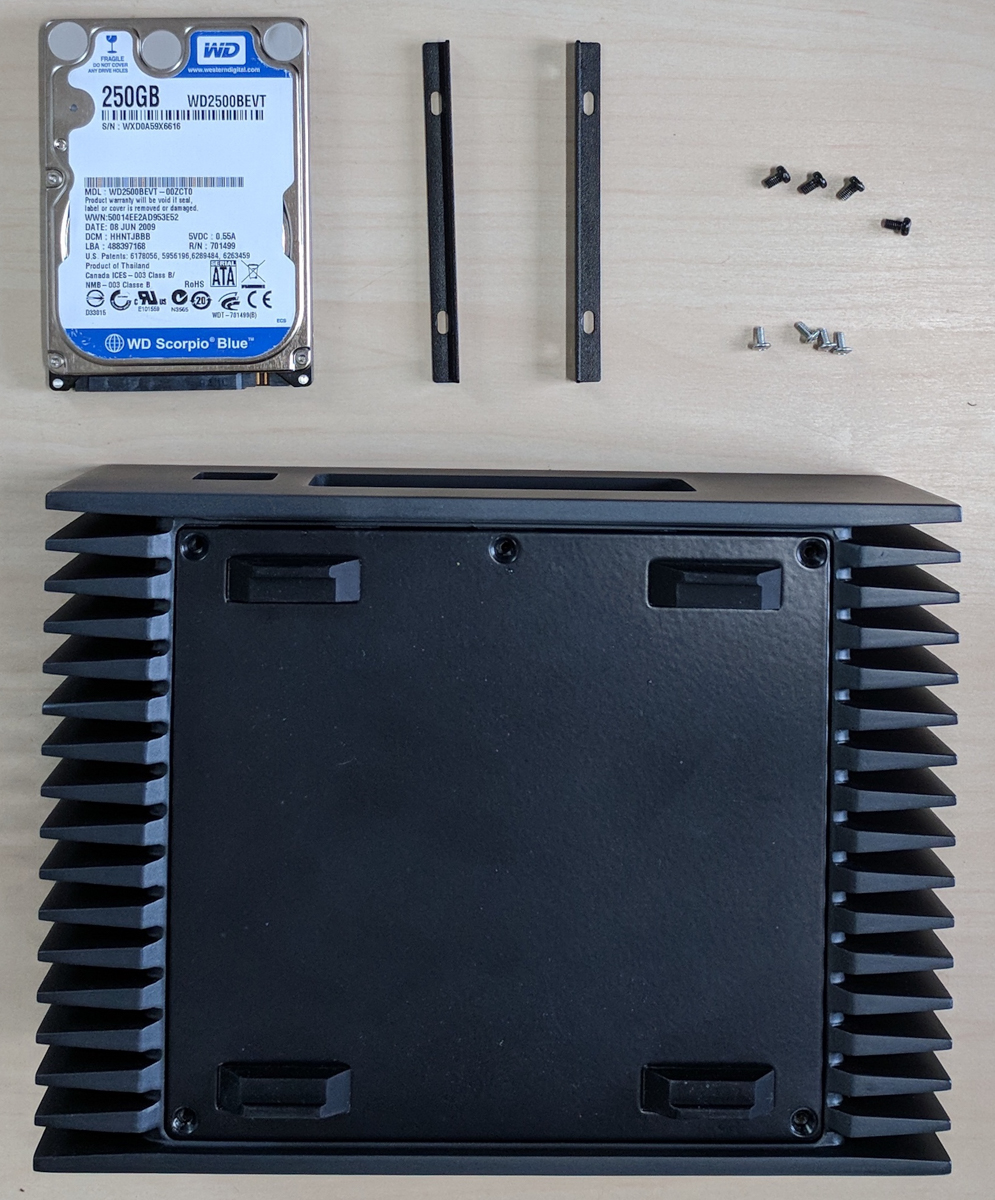
Figure 1.1 - Make sure you have everything
Step 2: Remove the cover
Unscrew the 5 black screws on the bottom of Nucleus (Figure 2.1), then remove the cover (Figure 2.2).

Figure 2.1 - Unscrew the cover
Figure 2.2 - Remove the cover
Step 3: Mount the hard drive rails
Mount the hard drive rails using the black screws, with the elongated holes facing down (Figure 3.1). An overhead view of the mounting rails is in Figure 3.2.

Figure 3.1 - Mount the hard drive rails using the black screws, with the elongated holes facing down
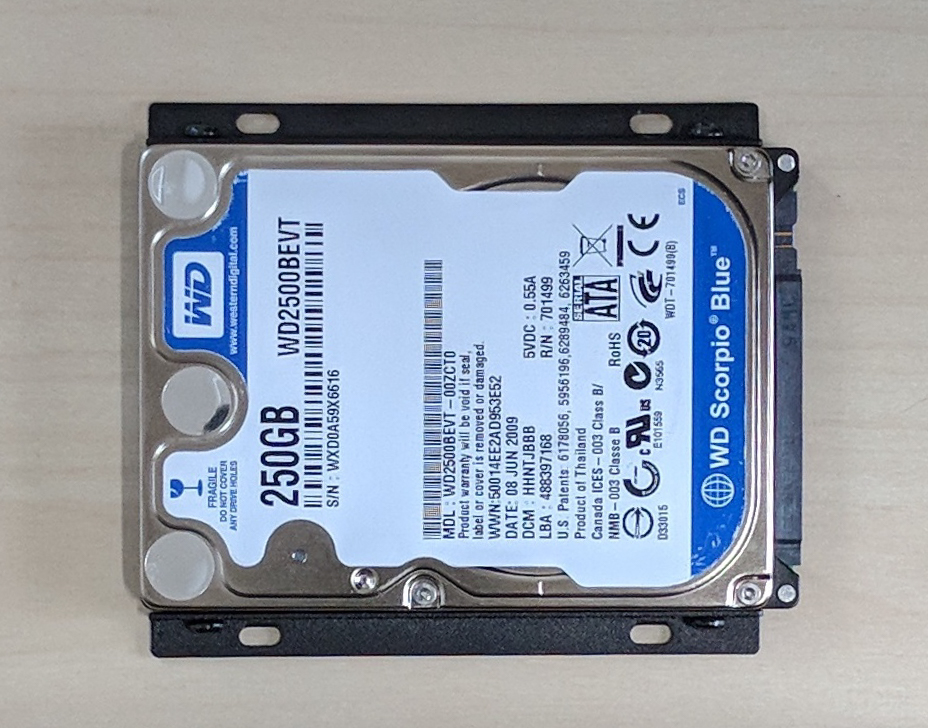
Figure 3.2 - Overhead view of the mounted hard drive Rails
Step 4: Install the hard drive
First, place the hard drive on the platform in Nucleus and leave it disconnected (Figure 4.1). Then, gently slide the hard drive into the connector (Figure 4.2).

Figure 4.1 - Place the hard drive on the platform, leave it disconnected

Figure 4.2 - Slide the hard drive into the connector
Step 5: Secure the hard drive
Now that the hard drive is connected, secure it with the remaining silver screws (Figure 5.1).

Figure 5.1 - Secure the hard drive with the silver screws
Step 6: Replace the cover
Replace the cover on your Nucleus using the five black screws from Step #2.
Step 7: Turn on the Nucleus and format the drive
Turn your Nucleus back on and visit the Nucleus Web Administration Interface to format this newly installed drive. Your drive will not be available in Roon until you format it using the Nucleus Web Administration Interface.
Related Articles
Formatting Nucleus Internal Storage
To start, let's connect to the [[Nucleus Web Administration Interface]]. Next, confirm that your drive is shown. If an HDD or SSD is attached to the Nucleus's internal SATA connector, you will see the "Internal Music Storage" section in the Web ...Nucleus Internal Storage
Your Nucleus supports an internal 2.5" HDD or SSD to create a self-contained music server. For a completely silent system, we recommend using an SSD. If you chose to use an SSD here, the system will stay fully silent. The entire internal storage ...Nucleus Migration Guide (Nucleus/Nucleus+ Rev A | Nucleus/Nucleus+ Rev B | Nucleus One | Nucleus Titan)
If you're setting up Nucleus, and your Roon Server had previously been running on Mac, Windows, or Linux, you'll need to migrate your Roon database. Your database includes your playlists, edits, play history, tags, settings, and more. This guide will ...Storage
Overview In Roon, Storage refers to the location(s) of your local library. Below, you will find a handful of popular storage locations along with their descriptions. Local Folders On first launch, Roon will find the default music folder on your ...Nucleus Media Storage And Audio Devices
Storage Devices Roon can watch multiple storage locations for files at the same time. That means you can simultaneously use any (or all) of the following storage locations: Devices connected directly to Nucleus by USB If your music is stored on an ...
Visit the Roon Community!
Need help? Thousands of Roon subscribers and audio enthusiasts are chatting over on our community site right now, join them! You don't even need a Roon subscription to sign up.