How to Install a Hard Drive in Nucleus Titan

Before starting this process, safely stop Roon Server from running, and power down your Nucleus.
To install a hard drive for internal music storage in your Nucleus Titan, please follow these steps:
1. Unscrew the bottom lid of the unit:
2. Unscrew the hard drive security screws:
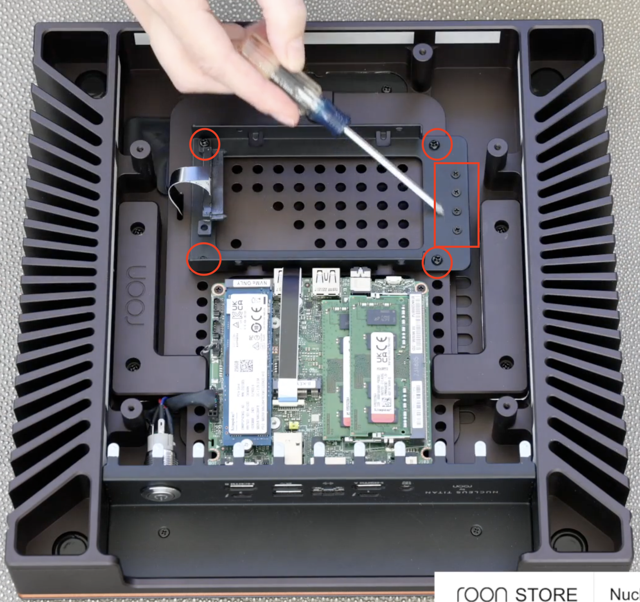
3. Align the storage tray with the new SSD:
4. Insert mounting screws:
5. Reinstall the tray and secure it with the screws:
6. Then, gently snap the cable back into place:
7. Now, secure the screws for the bottom plate:
Here is a video breakdown of how to install a Hard Drive in Nucleus Titan:
8. Format the new drive via Nucleus Web Administration Interface:
- After you've successfully installed the new hard drive, power the Nucleus on and reconnect to your network.
- To format the new drive, you'll need to access the Nucleus Web Administration Interface. It can be accessed by:
- Access your Roon Settings>Setup>Find>Click the IP of the Nucleus
- Using a web browser, you have three options:
- URL - Type in the IP of the Nucleus Titan
- Format the drive by clicking the "Format" button next to your drive
Once you've finished formatting the new drive, you can begin copying your music! Click here to learn how to copy music to your new drive.