Moving Roon to a new Server
Your Roon database contains your edits, playlists, favorites, play history, login information, and settings.
When setting up a new dedicated Roon Server (like a Nucleus or a ROCK), or just moving between Roon and RoonServer, you may want to transfer the database from old to new.
This will work regardless of what platform your Roon Server was previously running on. Your database will work on any platform that supports running a Roon Server.
Preparation
Before you start, confirm you're running the latest version of Roon on both the new and the old Roon Server. You can check this by clicking *About* on the *Settings* page. It is mandatory that both are fully updated.
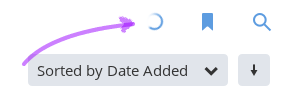
Also, on your old Roon Server, please confirm that the import process has completed. You can monitor this process by clicking the spinner in the top-right. If you don't have a spinner here, you are done importing.
Migrating
Step 1: Backup Your Database
In order to migrate Roon database to a new machine, the first step is to backup your database. To do this, we strongly recommend you connect a USB drive directly to your existing Roon Server, or use a NAS or other network storage device on your local network.

While Dropbox is a good way to keep an incremental backup in the cloud, we don't recommend it for this migration, as you will be transferring an entire copy of your database, and Dropbox will be significantly slower than USB or network storage.
If you already have a scheduled backup:
- Go to the "`Backup`" tab of Settings
- Click "`Scheduled Backups`"
- Click the "three dots" and select "`Force Backup Now`"
- When the backup completes you should see "Last Successful Backup" at the bottom of the Window
If you would like to create a new backup
- Go to the "`Backup`" tab of Settings
- Click the "`Backup`" button next to Backup Now
- When the backup completes you should see "Last Successful Backup" at the bottom of the Window
Step 2: Restore Your Database
Now that your Roon database is fully backed up, it's time to restore it to your new Roon Server.
- Make the backup accessible to the new Roon Server
- If you backed up to a USB drive, connect it now to the new Roon Server
- If you backed up to network storage, ensure you know the address, log in, and password for your NAS or network storage device
- Connect to the new Roon Server
- Start your new Roon Server
- After your new Roon Server is running, launch Roon on your Mac, Windows PC, iPad, or Android Tablet
We don't recommend using smaller Android tablets, iPhones or Android phones for this process.
- Since this is your first time launching your new Roon Server, you will be asked to log-in. Instead of logging in, click "Restore A Backup" in the lower-left hand corner. You will be prompted to log in after selecting "Restore a Backup".
- Use Roon's file browser to locate the `RoonBackups` folder you created in Step 1
- If you created a USB backup, it should be connected to your Roon Server and you can navigate to it
- If you backed up to network storage, you can find the `RoonBackups` folder by clicking _Add Network Share_ and entering the details for your NAS
- Read on to make sure your Storage settings, Audio settings, and other configuration details are updated properly
Step 3: Configuration
There are a few other considerations once your database has been restored, in order to get everything back to normal.
Storage
Networked storage devices (like a shared folder on a NAS) will work without any further changes after restoring.
For other storage, you will need to edit your current storage settings so that Roon can find this music at a different location.
Please follow this guide to do this in a manner that won't cause your edits/favorites/play history to be lost.
Audio
Network audio devices (such as RoonReady devices, RoonBridge, Squeezebox, HQPlayer, etc) will work without any further changes after restoring.
If you previously had an audio device directly connected to the machine running your Roon Server, you can connect that device to your new Roon Server and configure it as normal.
If you'd prefer to keep the audio device connected to the machine that was previously running your Roon Server, you can also install Roon Bridge on that machine in order to make it accessible over your network.
Previous Roon Server
Once your new Roon Server machine is up and running, you can continue running Roon as a remote on the machine that previously ran your Roon Server. It is important that you "clean up" the machine that was previously running your database. You do not want the same database running on two machines.
We recommend renaming or deleting the Roon database folder on the machine that previously ran your Roon Server. You can find the Roon database folder here.

Please make sure you have a backup of your database before deleting it.
Related Articles
FAQ: Moving Your Roon License to a New Server. Authorization Flows.
When setting up Roon on a new Server, you may be prompted to move your Roon license from an existing Server to the new one. Roon provides a guided authorization experience to help you complete the switch. Since there can only be one active session at ...What is a Backup in Roon?
A Roon backup is a snapshot of your database at a given time. It saves all the ways you’ve customized Roon: Playlists (including those from streaming services and local files) Album and track edits (metadata corrections, artwork changes, merges) ...Setting Up a Backup in Roon
Before You Start Decide where you want to store your Roon backups: on a local folder, an external USB drive, a network share (NAS), or Dropbox. Make sure the destination is always accessible from your Roon Server, and avoid folders that are being ...Installing RoonServer on Unraid with Docker
This guide explains how to run the official Roon Server Docker image on Unraid using its built-in Docker interface. Useful Links: GitHub repository: https://github.com/RoonLabs/roon-docker Configuration generator: ...Installing RoonServer on ASUSTOR with Docker
This guide explains how to run the official Roon Server Docker image on an ASUSTOR NAS using Portainer. Useful Links: GitHub repository: https://github.com/RoonLabs/roon-docker Configuration generator: https://roonlabs.github.io/roon-docker/ Before ...
Visit the Roon Community!
Need help? Thousands of Roon subscribers and audio enthusiasts are chatting over on our community site right now, join them! You don't even need a Roon subscription to sign up.